Tag

server

Browsing

If you want to open or close a port for a Linux firewall you have to edit the rules in the iptables configuration. By default iptables firewall stores its configuration at /etc/sysconfig/iptables file. You need to edit this file and add rules to open port.

Here are the steps to open the port XY using the default visual editor vi:

Open port XY

Open file /etc/sysconfig/iptables:

# vi /etc/sysconfig/iptables

Append rule as follows:

-A RH-Firewall-1-INPUT -m state --state NEW -m tcp -p tcp --dport XY -j ACCEPT

Save and close the file. Restart iptables:

# /etc/init.d/iptables restart

Verify that port is open

Run following command:

# netstat -tulpn | less

Make sure iptables is allowing port connections:

# iptables -L -n

For more information visit:

http://www.cyberciti.biz/faq/howto-rhel-linux-open-port-using-iptables/

This support solution is on installing a 32-bit app on an x64 system. Stated on the example of Java Development Kit installed on Fedora x64 bit.

Three layers are essential when it comes to 32/64bit compatibility:

– Processor

– Operating System

– Application

A 32 bit OS will run on a 32 or 64-bit processor, without any problems.


A 32-bit software on a 64 bit OS works but could cause difficulties even if the 64 bit systems are backward compatible with the 32-bit counterparts.


To run a 64 bit OS, you need support from its lower level (a 64-bit processor). Therefore a 64 bit OS does not work for a 32 bit CPU.


To run a 64-bit application, you need support from all lower levels (64 bit OS and 64-bit processor).

Linux commands:
Check your processor:

# cat /proc/cpuinfo

Check Kernel/System:

# uname -m

For our example, the perfect solution is to install a 64-bit version of JDK on the Fedora x64 bit operating system.

Here is the How-To-Do:

The first thing we need to do is get the JDK installer
JDK Home from Oracle.com

Once we have the installer in our local repository (as root):

chmod a+x  jdk-6u21-linux-x64-rpm.bin./jdk-6u21-linux-x64-rpm.bin

Next, we must add these two lines to the file: /etc/profile

JAVA_HOME=/usr/java/jdk1.6.0_21
pathmunge $JAVA_HOME/jre/bin after

At the end of the line that starts with export, we need to add this our JAVA_HOME variable, so the line should be like this:

export PATH USER LOGNAME MAIL HOSTNAME HISTSIZE INPUTRC JAVA_HOME

Then, we need to execute the next statements. Hint: Copy all the lines as it were just one.

export JAVA_HOME=/usr/java/jdk1.6.0_21
export JAVA_ALTERNATIVE_PRIORITY=16021
/usr/sbin/update-alternatives --install /usr/bin/java java $JAVA_HOME/bin/java $JAVA_ALTERNATIVE_PRIORITY
/usr/sbin/update-alternatives --install /usr/bin/javadoc javadoc $JAVA_HOME/bin/javadoc $JAVA_ALTERNATIVE_PRIORITY
/usr/sbin/update-alternatives --install /usr/bin/appletviewer appletviewer $JAVA_HOME/bin/appletviewer $JAVA_ALTERNATIVE_PRIORITY
/usr/sbin/update-alternatives --install /usr/bin/javah javah $JAVA_HOME/bin/javah $JAVA_ALTERNATIVE_PRIORITY
/usr/sbin/update-alternatives --install /usr/bin/javac javac $JAVA_HOME/bin/javac $JAVA_ALTERNATIVE_PRIORITY
/usr/sbin/update-alternatives --install /usr/bin/jar jar $JAVA_HOME/bin/jar $JAVA_ALTERNATIVE_PRIORITY

Then, we export the alternatives:

/usr/sbin/update-alternatives --auto java
/usr/sbin/update-alternatives --auto javadoc
/usr/sbin/update-alternatives --auto appletviewer
/usr/sbin/update-alternatives --auto javah
/usr/sbin/update-alternatives --auto javac
/usr/sbin/update-alternatives --auto jar

To confirm that our installation is successful:

java -version

Should give us output like this:

[root@yourMachine]# java -version
java version "1.6.0_21"
Java(TM) SE Runtime Environment (build 1.6.0_21-b02)
Java HotSpot(TM) 64-Bit Server VM (build 16.3-b01, mixed mode)

ServerPronto offers the best affordable and secure hosting service in all dedicated server packages.

Further information:
http://www.techsupportalert.com/content/32-bit-and-64-bit-explained.htm

http://wporta.wordpress.com/2010/07/06/installing-jdk-in-fedora-13/

You can manage and create users with Webmin by:

System/Users and groups/Create a new user


More information:

http://doxfer.webmin.com/Webmin/WebminUsers


If you want to add new domains, for example:

[email protected]
[email protected]

You need to add those domains to

/etc/mail/local-host-names

then in

/etc/mail/virtusertable

enter

[email protected] john
[email protected] sally

john and sally are local users

and rebuild config with

make -C /etc/mail/


ServerPronto offers the best affordable and secure hosting service in all dedicated server packages.


More information:

http://www.linuxselfhelp.com/quick/sendmail.html

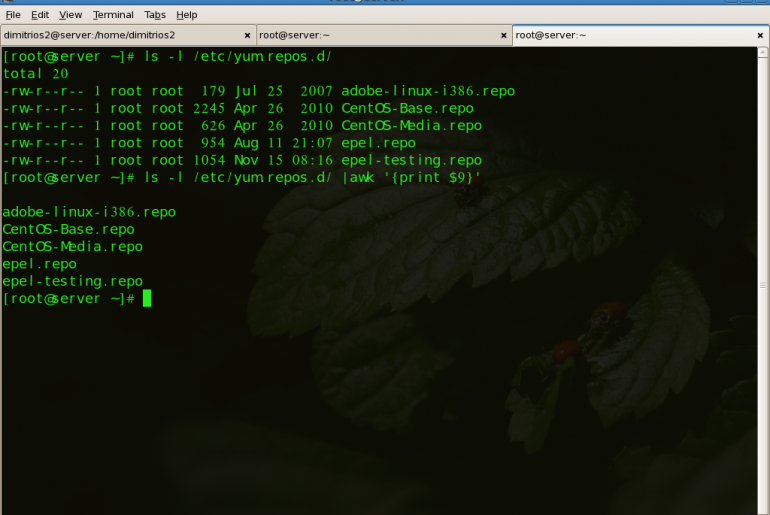
Managed system yum is software installation tool for Red Hat Linux and Fedora Linux. yum commands are typically run as.yum <command> <package name/s> By default, yum will automatically attempt to check all configured repositories to resolve all package dependencies during an installation/upgrade.

Here is a list of the most common and used yum commands:

yum list all

To list all packages that are available to use the commandyum.

yum install <package name/s>

Used to install the latest version of a package or group of packages. If no package matches the specified package name(s), they are assumed to be a shell glob, and any matches are then installed.

yum update <package name/s>

Used to update the specified packages to the latest available version. If no package name/s are specified, then yum will attempt to update all installed packages.

If the –obsoletes option is used (i.e. yum –obsoletes <package name/s>, yum will process obsolete packages. As such, packages that are obsoleted across updates will be removed and replaced accordingly.

yum check-update

This command allows you to determine whether any updates are available for your installed packages. yum returns a list of all package updates from all repositories if any are available.

yum remove <package name/s>

Used to remove specified packages, along with any other packages depend on the packages being removed.

yum provides <file name>

Used to determine which packages provide a specific file or feature.

yum search <keyword>

This command is used to find any packages containing the specified keyword in the description, summary, packager and package name fields of RPMs in all repositories.

yum localinstall <absolute path to package name/s>

Used when using yum to install a package located locally in the machine.

ServerPronto offers the best affordable and secure hosting service in all dedicated server packages.


More info under:

http://www.centos.org/docs/5/html/5.1/Deployment_Guide/s1-yum-useful-commands.html

http://yum.baseurl.org/wiki/YumCommands

Here are three steps that are necessary for the FTP daemon to allow connections:

  1. A non-root user must be created.
  2. The vsftp daemon must be started, you can do this with “/etc/init.d/vsftpd start”.
  3. The firewall must allow port 21. You can add the firewall run in Webmin or by editing /etc/sysconfig/iptables, then restarting the firewall with “/etc/init.d/iptables restart”

The FTP user will have permission in their home directory. In order for the FTP user to have permission to upload, create any folder or allow different access, it is needed to grant the user access to that location using chown or chmod.

ServerPronto offers the best affordable and secure hosting service in all dedicated server packages.

 If you try to access CPanel WHM via https://server.domain.com:2087/ and the error “There is a problem with this website’s security certificate” comes up it can be because it uses a default SSL certificate loaded during the automated install and you need to update it with your personalized certificate.

To have a non-self-signed certificate you will need to create a certificate request using the domain and credentials you intend to connect with. Then upload that cert request to an SSL provider site where you have an account. After purchasing a certificate you can install it into CPanel.

Install a SSL Certificate for WHM port 2087 and cPanel port 2083:

1) Purchase / Install the Certificate for your fully qualified domain (ie: server.domain.com)

– You can find your fully qualified server URL in the WHM under:
>> Server Status >> Server Information (System Information)

– Then you will create a certificate for this domain under:
>> SSL / TLS >> Generate a SSL Certificate and Signing Request

– After purchasing your certificate, you will install the certificate under:
** THIS MAY SEEM SLOW – BE PATIENT – WAIT FOR A BOLD CONFIRMATION MESSAGE **
>> SSL / TLS >> Install a SSL Certificate and Setup the Domain

– After installation is complete, you can assign the new certificate to be your SHARED certificate under:
** This is NOT required but is a great benefit for your clients and helps brand your domain **
>> SSL / TLS >> Manage SSL Hosts

2) Test your new Certificate

https://server.domain.com/
This should resolve and the cert should function properly before moving forward. If this does not work, you will need to review addition instruction on SSL installation.

https://server.domain.com:2087/
This should NOT WORK but give you an invalid certificate error. The reason is that the certificate is installed for the domain only, and has not been assigned to the appropriate WHM/CPANEL services.

3) Install the CERT for the WHM and CPANEL Service (this is the step you don’t think about!!)

Service Configuration >> Manage Service SSL Certificates
> Select “Install New Certificate” for the “cPanel/WHM/Webmail Service”
> Select Domain this CRT is for “Browse”
> Pick the full server cert you installed “server.domain.com”
> Press “Submit” to install

4) Test your Service Certificate

https://server.domain.com:2087/

ServerPronto offers the best affordable and secure hosting service in all dedicated server packages.


More information under:

Manage SSL Certs

Configure WHM cPanel SSL Certificate

When changing configuration settings in Apache using directives in .htaccess files make sure:

    • – The full directory content is listed with:    ls -a to view hidden file that start with “.”
    • – ensure Apache can use .htaccess, it is necessary to verify that option is enabled
      • – enabled .htaccess in httpd.conf

How-To-Do:

http://httpd.apache.org/docs/2.2/howto/htaccess.html

ServerPronto offers the best affordable and secure hosting service in all dedicated server packages.

If you have problems setting up an FTP server or issues accessing your FTP site, here are two basic tips that have helped our customers before to make their FTP server work properly.

  1. Check if the FTP daemon you are using is installed correctly and is running
  2. Verify the software firewall rules

The FTP server should be allowed to accept TCP connections to port 21, and to make TCP connections from port 20 to any port

For further details, here are helpful instructions on how to set up your FTP server:

FTP Configuration in Linux

http://www.linuxhomenetworking.com/wiki/index.php/Quick_HOWTO_:_Ch15_:_Linux_FTP_Server_Setup#Introduction

http://www.mdjnet.dk/ftp.html

FTP Configuration in Windows Server 2008

http://learn.iis.net/page.aspx/309/configuring-ftp-firewall-settings/

FTP Configuration using cPanel

http://docs.cpanel.net/twiki/bin/view/AllDocumentation/CpanelDocs/FTPAccounts

ServerPronto offers the best affordable and secure hosting service in all dedicated server packages.

At ServerPronto we build our customer’s orders precisely and accurately. We do double duty on quality control during the provisioning process, still, we encourage our customers to check the hardware settings of the server you ordered.

Linux commands to check hardware:

Harddrive

fdisk –l

Memory

cat /proc/meminfo

CPUcat /proc/cpuinfo


ServerPronto offers the best affordable and secure hosting service in all dedicated server packages.