
Tag

web hosting

Browsing

Ubuntu is a very customizable operating system and everyone has their own reasons and needs for any particular OS. Still, these 10 configuration tips are worth a look and definitively can be considered to do immediately after an Ubuntu installation. Thanks to UbuntuLinuxHelp.

1) sudo aptitude install sbackup

Nothing is worse than losing all your important data (pictures, email messages, music, documents, etc.) The above command will install Simple Backup Suite (more details found on Sourceforge). For me at least it’s a great desktop backup solution. I can select which directories I want to be backed up (full and incremental), then have backups automatically transferred to my external network storage. I play a lot with my computer, I often break something as a result. With sbackup, I can be more confident as it’s easy to restore data (in the event I have to reinstall an application or even worse… the OS itself). You can also install via:

apt:sbackup

2) sudo aptitude install ubuntu-restricted-extras && sudo aptitude install w64codecs

If you enjoy music, videos, and so forth, you’ll want to install the extra media codecs and packages that will allow you to play almost any desktop media format (mov, mpg, avi, wmv, mp3 and so on). I wrote a detailed post:  “Build a Web Developer PC and Enable Most Media Playback Using Ubuntu Linux”, which provides a bit more of an in-depth explanation of the above command (including editing the sources.list to include mediabuntu). Note: If you have a 32 Bit system, change the “w64codec” part of the command to say “w32codecs” instead. You can also install these packages via:

apt:ubuntu-restricted-extras

apt:w64codecs

3) sudo apt-get install msttcorefonts && sudo fc-cache -fv

I like having the same fonts used by Windows users. People often send me .doc files, so I want to ensure I have at least the core fonts they use. The above command installs the Microsoft core fonts and then reloads the font cache. I’ve posted about this before at “How to Install TTF and CTF Fonts in Ubuntu”, which contains far more detail. You can also install the core fonts via:

apt:msttcorefonts

4) sudo aptitude install vlc

I prefer not to try juggling with the use of different applications to play different media types. VLC plays all the media types I access. For me at least, it’s the singular application I use to play everything from an MP3 file to a DVD video (and incidentally, vlc can stream your media to other computers, even to the television!). Of course, you can click the apt link and install via:

apt:vlc

5) sudo aptitude install k3b

Even though I use gnome, I still install k3b, which is (in my opinion) among the best DVD/CD burners around. I find the interface intuitive and easy to use. There’s a post containing more applications at “Top 100 of the Best (Useful) OpenSource Applications”. Using apt links, we can also install k3b via:

apt:k3b

6) Enable surround sound right away. I have an earlier post at Enable 5.1 Surround Sound on Linux – Ubuntu 8.04 Hardy, but the jist of the instructions is to edit

sudo gedit /etc/pulse/daemon.conf and change the line that says:

; default-sample-channels = 2

to say

default-sample-channels = 6

7) Use the “Windows” Key.

I prefer using keyboard shortcuts instead of the point and click the mouse. Thankfully, there’s an easy way to turn your keyboards “Windows key” into an Ubuntu key.

Go to: System -> Preferences -> Keyboard Shortcuts

Scroll down to the action “Show panel menu” and click on it. (The phrase “New accelerator menu…” will appear).

Now simply press your Windows key once. (You’ll see the accelerator now says “Super L”). Select the “Close” option and you’ll see that your Windows key now works. Note: If you ever want to change it back to the default (for Hardy 8.04), the original setting is Alt f1.

8 ) Make gedit remember more documents.

I often use gedit to quickly edit files in a GUI environment. I often wish gedit would remember more of the documents I edit. That way I don’t have to surf through the file system. There’s a simple way to ensure gedit remembers more of the files you edit:

sudo gconf-editor

In the window that appears (using the above command), select

apps -> gedit2 -> preferences -> ui -> recent

Select the “max_recents” key and change the default of 5 to 10

9) Increase the start speed of multi-core CPU systems.

This will slow down systems that have a single CPU. For multi-core CPUs, we can change the services to all start together (in parallel) during boot time. The command to do this is;

sudo perl -i -pe ‘s/CONCURRENCY=none/CONCURRENCY=shell/’ /etc/init.d/rc

and then reboot with

sudo shutdown -r now

10) Finally, I sometimes need to run an application that is for another OS (not Ubuntu Linux). Virtualization is the answer and allows me to run the other application without using Wine ore rebooting into another OS. You can install Virtualbox:

sudo aptitude install virtualbox

If you’re interested, more information about VirtualBox can be found by visiting the about VirtualBox page. Again, here’s the apt link to install VirtualBox:

apt:VirtualBox

A bonus tip!

I’m often asked how to uninstall a .deb package. The command to facilitate that is:

sudo dpkg -r package_name

More about this at http://ubuntulinuxhelp.com/10-things-to-do-after-installing-ubuntu-linux/

ServerPronto offers the best affordable and secure hosting service in all dedicated server packages.


How to access your server:

To get direct access to your server console, it needs to be done via SSH (Secure SHell) to do so you need a software named Putty.  If you are running windows, just download it (download), run it, give it your IP that that way it would connect, when it asks you your user and password it’s located on the welcome email you received from us that also contains the server IP.

If you are using any Linux distribution or a Mac computer, just open the terminal and type ssh IP (Where IP is your server’s IP)

Control Panel

The control panel that is installed by default is called Webmin. Most of the tasks that you need to do to manage your server can help do it there. To access it just head over to your browser and enter https://yourip:10000. It’s going to ask you for your username and password; it’s the same that you use to access via SSH which is the same as you got on the welcome email. From there on you will only need a couple of minutes to find all the tasks you need to be done.

ServerPronto offers the best affordable and secure hosting service in all dedicated server packages.

# fsck
fsck is used to check and optionally repair one or more Linux file systems.

If no filesystems are specified on the command line, and the -A option is not specified, fsck will default to checking filesystems in /etc/fstab serial. This is equivalent to the -As options.

The exit code returned by fsck is the sum of the following conditions:
0 – No errors
1 – File system errors corrected
2 – System should be rebooted
4 – File system errors left uncorrected
8 – Operational error
16 – Usage or syntax error
32 – Fsck canceled by user request
128 – Shared library error
The exit code returned when multiple file systems are checked is the bit-wise OR of the exit codes for each file system that is checked.

Options:

-s
Serialize fsck operations. This is a good idea if you are checking multiple filesystems and the checkers are in an interactive mode. (Note: e2fsck(8) runs in an interactive mode by default. To make e2fsck(8) run in a non-interactive mode, you must either specify the -p or -a option, if you wish for errors to be corrected automatically, or the n option if you do not.)
-t fslist
Specifies the type(s) of the file system to be checked. When the -A flag is specified, only filesystems that match fslist are checked. The fslist parameter is a comma-separated list of filesystems and options specifiers. All of the filesystems in this comma-separated list may be prefixed by a negation operator ‘no‘ or ‘!‘, which requests that only those filesystems not listed in fslist will be checked. If all of the filesystems infslist are not prefixed by a negation operator, then only those filesystems listed infslist will be checked. Options specifiers may be included in the comma-separated fslist. They must have the format opts=fs-option. If an options specifier is present, then only filesystems which contain fs-option in their mount options field of /etc/fstab will be checked. If the options specifier is prefixed by a negation operator, then only those filesystems that do not have fs-option in their mount options field of /etc/fstab will be checked.

For example, if opts=ro appears in fslist, then only filesystems listed in /etc/fstabwith the ro option will be checked.

For compatibility with Mandrake distributions whose boot scripts depend upon an unauthorized UI change to the fsck program, if a filesystem type of loop is found infslist, it is treated as if opts=loop were specified as an argument to the -t option.

Normally, the filesystem type is deduced by searching for filesys in the /etc/fstab file and using the corresponding entry. If the type can not be deduced, and there is only a single filesystem given as an argument to the -t option, fsck will use the specified filesystem type. If this type is not available, then the default file system type (currently ext2) is used.

-A
Walk through the /etc/fstab file and try to check all file systems in one run. This option is typically used from the /etc/rc system initialization file, instead of multiple commands for checking a single file system. The root filesystem will be checked first unless the -P option is specified (see below). After that, filesystems will be checked in the order specified by the fs_passno (the sixth) field in the /etc/fstab file. Filesystems with a fs_passno value of 0 are skipped and are not checked at all. Filesystems with a fs_passno value of greater than zero will be checked in order, with filesystems with the lowest fs_passno number being checked first. If there are multiple filesystems with the same pass number, fsck will attempt to check them in parallel, although it will avoid running multiple filesystem checks on the same physical disk.

Hence, a very common configuration in /etc/fstab files is to set the root filesystem to have a fs_passno value of 1 and to set all filesystems to have a fs_passno value of 2. This will allow fsck to automatically run filesystem checkers in parallel if it is advantageous to do so. System administrators might choose not to use this configuration if they need to avoid multiple filesystem checks running in parallel for some reason — for example, if the machine in question is short on memory so that excessive paging is a concern.

-C
Display completion/progress bars for those filesystems checkers (currently only for ext2) which support them. Fsck will manage the filesystem checkers so that only one of them will display a progress bar at a time.
-N
Don’t execute, just show what would be done.
-P
When the -A flag is set, check the root filesystem in parallel with the other filesystems. This is not the safest thing in the world to do since if the root filesystem is in doubt things like the e2fsck (8) executable might be corrupted! This option is mainly provided for those sysadmins who don’t want to repartition the root filesystem to be small and compact (which is really the right solution).
-R
When checking all file systems with the -A flag, skip the root file system (in case it’s already mounted read-write).
-T
Don’t show the title on startup.
-V
Produce verbose output, including all file system-specific commands that are executed.
For more information visit: http://linux.about.com/od/commands/l/blcmdl8_fsck_.htm
ServerPronto offers the best affordable and secure hosting service in all dedicated server packages.

If you want to open or close a port for a Linux firewall you have to edit the rules in the iptables configuration. By default iptables firewall stores its configuration at /etc/sysconfig/iptables file. You need to edit this file and add rules to open port.

Here are the steps to open the port XY using the default visual editor vi:

Open port XY

Open file /etc/sysconfig/iptables:

# vi /etc/sysconfig/iptables

Append rule as follows:

-A RH-Firewall-1-INPUT -m state --state NEW -m tcp -p tcp --dport XY -j ACCEPT

Save and close the file. Restart iptables:

# /etc/init.d/iptables restart

Verify that port is open

Run following command:

# netstat -tulpn | less

Make sure iptables is allowing port connections:

# iptables -L -n

For more information visit:

http://www.cyberciti.biz/faq/howto-rhel-linux-open-port-using-iptables/

This support solution is on installing a 32-bit app on an x64 system. Stated on the example of Java Development Kit installed on Fedora x64 bit.

Three layers are essential when it comes to 32/64bit compatibility:

– Processor

– Operating System

– Application

A 32 bit OS will run on a 32 or 64-bit processor, without any problems.


A 32-bit software on a 64 bit OS works but could cause difficulties even if the 64 bit systems are backward compatible with the 32-bit counterparts.


To run a 64 bit OS, you need support from its lower level (a 64-bit processor). Therefore a 64 bit OS does not work for a 32 bit CPU.


To run a 64-bit application, you need support from all lower levels (64 bit OS and 64-bit processor).

Linux commands:
Check your processor:

# cat /proc/cpuinfo

Check Kernel/System:

# uname -m

For our example, the perfect solution is to install a 64-bit version of JDK on the Fedora x64 bit operating system.

Here is the How-To-Do:

The first thing we need to do is get the JDK installer
JDK Home from Oracle.com

Once we have the installer in our local repository (as root):

chmod a+x  jdk-6u21-linux-x64-rpm.bin./jdk-6u21-linux-x64-rpm.bin

Next, we must add these two lines to the file: /etc/profile

JAVA_HOME=/usr/java/jdk1.6.0_21
pathmunge $JAVA_HOME/jre/bin after

At the end of the line that starts with export, we need to add this our JAVA_HOME variable, so the line should be like this:

export PATH USER LOGNAME MAIL HOSTNAME HISTSIZE INPUTRC JAVA_HOME

Then, we need to execute the next statements. Hint: Copy all the lines as it were just one.

export JAVA_HOME=/usr/java/jdk1.6.0_21
export JAVA_ALTERNATIVE_PRIORITY=16021
/usr/sbin/update-alternatives --install /usr/bin/java java $JAVA_HOME/bin/java $JAVA_ALTERNATIVE_PRIORITY
/usr/sbin/update-alternatives --install /usr/bin/javadoc javadoc $JAVA_HOME/bin/javadoc $JAVA_ALTERNATIVE_PRIORITY
/usr/sbin/update-alternatives --install /usr/bin/appletviewer appletviewer $JAVA_HOME/bin/appletviewer $JAVA_ALTERNATIVE_PRIORITY
/usr/sbin/update-alternatives --install /usr/bin/javah javah $JAVA_HOME/bin/javah $JAVA_ALTERNATIVE_PRIORITY
/usr/sbin/update-alternatives --install /usr/bin/javac javac $JAVA_HOME/bin/javac $JAVA_ALTERNATIVE_PRIORITY
/usr/sbin/update-alternatives --install /usr/bin/jar jar $JAVA_HOME/bin/jar $JAVA_ALTERNATIVE_PRIORITY

Then, we export the alternatives:

/usr/sbin/update-alternatives --auto java
/usr/sbin/update-alternatives --auto javadoc
/usr/sbin/update-alternatives --auto appletviewer
/usr/sbin/update-alternatives --auto javah
/usr/sbin/update-alternatives --auto javac
/usr/sbin/update-alternatives --auto jar

To confirm that our installation is successful:

java -version

Should give us output like this:

[root@yourMachine]# java -version
java version "1.6.0_21"
Java(TM) SE Runtime Environment (build 1.6.0_21-b02)
Java HotSpot(TM) 64-Bit Server VM (build 16.3-b01, mixed mode)

ServerPronto offers the best affordable and secure hosting service in all dedicated server packages.

Further information:
http://www.techsupportalert.com/content/32-bit-and-64-bit-explained.htm

http://wporta.wordpress.com/2010/07/06/installing-jdk-in-fedora-13/

You can manage and create users with Webmin by:

System/Users and groups/Create a new user


More information:

http://doxfer.webmin.com/Webmin/WebminUsers


If you want to add new domains, for example:

[email protected]
[email protected]

You need to add those domains to

/etc/mail/local-host-names

then in

/etc/mail/virtusertable

enter

[email protected] john
[email protected] sally

john and sally are local users

and rebuild config with

make -C /etc/mail/


ServerPronto offers the best affordable and secure hosting service in all dedicated server packages.

 

More information:

http://www.linuxselfhelp.com/quick/sendmail.html

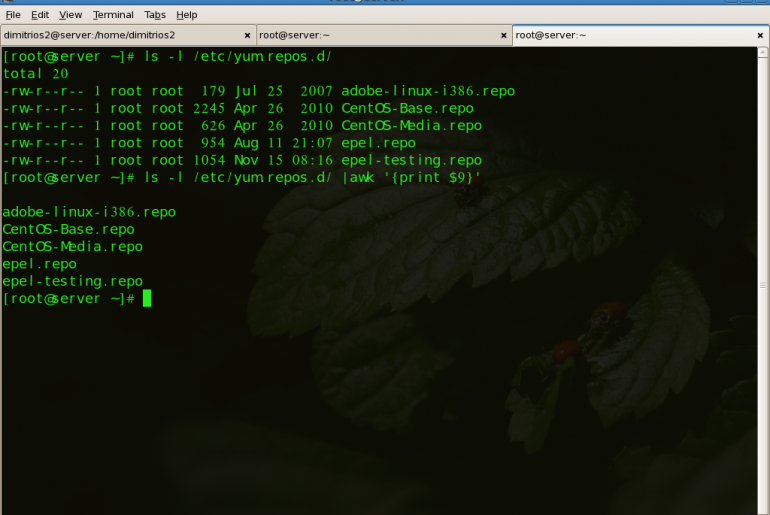
Managed system yum is software installation tool for Red Hat Linux and Fedora Linux. yum commands are typically run as.yum <command> <package name/s> By default, yum will automatically attempt to check all configured repositories to resolve all package dependencies during an installation/upgrade.

Here is a list of the most common and used yum commands:

yum list all

To list all packages that are available to use the commandyum.

yum install <package name/s>

Used to install the latest version of a package or group of packages. If no package matches the specified package name(s), they are assumed to be a shell glob, and any matches are then installed.

yum update <package name/s>

Used to update the specified packages to the latest available version. If no package name/s are specified, then yum will attempt to update all installed packages.

If the –obsoletes option is used (i.e. yum –obsoletes <package name/s>, yum will process obsolete packages. As such, packages that are obsoleted across updates will be removed and replaced accordingly.

yum check-update

This command allows you to determine whether any updates are available for your installed packages. yum returns a list of all package updates from all repositories if any are available.

yum remove <package name/s>

Used to remove specified packages, along with any other packages depend on the packages being removed.

yum provides <file name>

Used to determine which packages provide a specific file or feature.

yum search <keyword>

This command is used to find any packages containing the specified keyword in the description, summary, packager and package name fields of RPMs in all repositories.

yum localinstall <absolute path to package name/s>

Used when using yum to install a package located locally in the machine.

ServerPronto offers the best affordable and secure hosting service in all dedicated server packages.
 

More info under:

http://www.centos.org/docs/5/html/5.1/Deployment_Guide/s1-yum-useful-commands.html

http://yum.baseurl.org/wiki/YumCommands

Here are three steps that are necessary for the FTP daemon to allow connections:

  1. A non-root user must be created.
  2. The vsftp daemon must be started, you can do this with “/etc/init.d/vsftpd start”.
  3. The firewall must allow port 21. You can add the firewall run in Webmin or by editing /etc/sysconfig/iptables, then restarting the firewall with “/etc/init.d/iptables restart”

The FTP user will have permission in their home directory. In order for the FTP user to have permission to upload, create any folder or allow different access, it is needed to grant the user access to that location using chown or chmod.

ServerPronto offers the best affordable and secure hosting service in all dedicated server packages.